
Hey loves! It’s probably been about a month since you moved on campus and I bet you’ve been too busy to decorate your dorm or haven’t figured out how to decorate it…well I’ve rounded up some DIY projects to make your dorm feel more home-like!
Woven Wall Hanging

If you follow me on Instagram, you’ve probably seen this before! I don’t remember exactly how I got interested in these weavings but I’m so glad I did! They are super easy to make, customizable and really cute. You also don’t need much to make them either.
The supplies:
- Cardboard (to create your “loom”)
- Scissors
- Yarn of your choice (1-2 colors is fine, you won’t need more than one skein each)
- Wooden Dowel (or you can use a stick! Just make sure to clean it well)
- Plastic needle for weaving (you could probably make a makeshift one from cardboard, just cut a little hole and thread the yarn through there!)
- Gluestick or liquid glue
So starting with your cardboard, measure out a rectangle approximately 11.5″ H x 8″ W. This is going to be your loom base.
Measure out two strips of cardboard measuring 1″ H x 8″ W. We’ll glue this onto the loom base later.
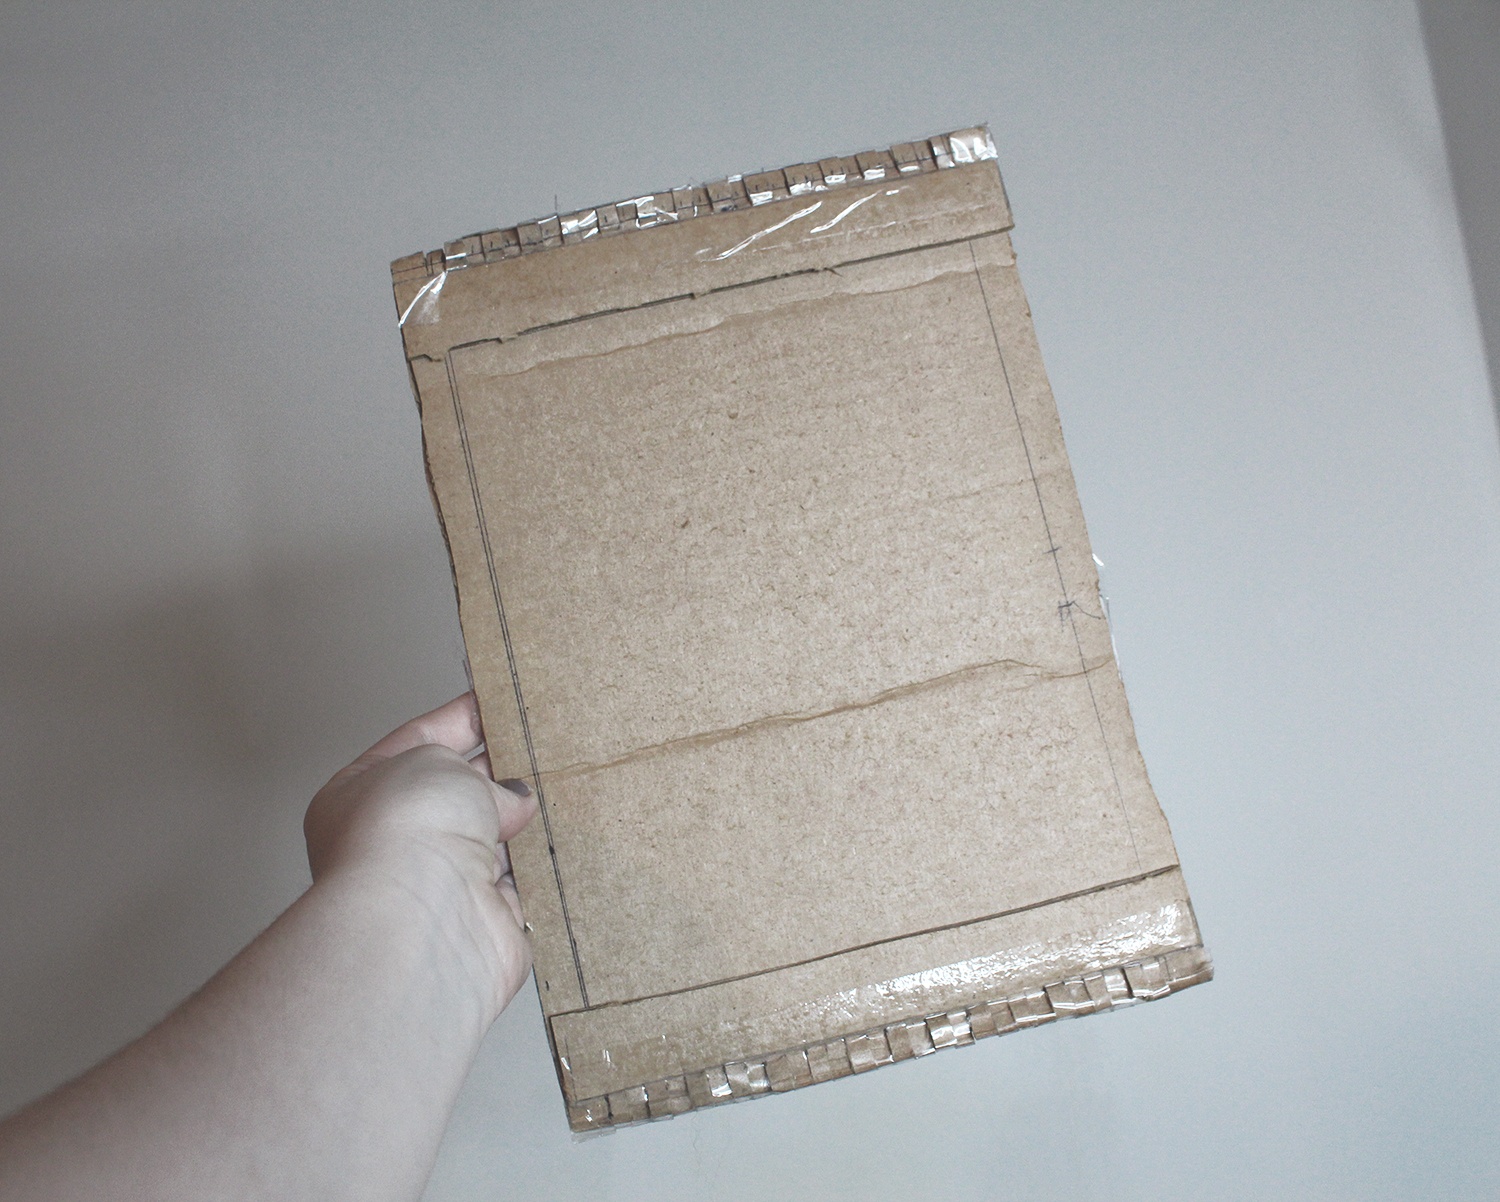 Mark a 1/2″ from each side of your loom, I just drew a line so I would know not to cut beyond that point. So 1/2″ from the top, bottom and the left and right sides. From the 1/2″ marks on the top and bottom, measure out 1/4″ marks from one side to the other so you have 1/4″ marks going across the width of your loom base (see my pictures for reference!)
Grab your scissors and cut on each of these 1/4″ lines, but make sure not to cut them beyond the 1/2″ marks you made (again, look at my picture for reference 🙂 ) After you have finished that on the top and bottom, grab the cardboard strips you cut out earlier. Glue these to where the cuts finish. These pieces help the yarn sit a little higher so it’s not directly against the loom base. Let it dry!
After your loom base is dry, now you can begin your weaving project! Grab some yarn that you want to use as the “spine” for your weaving (ex: I used black for mine in the picture above, so you can see it in between my colors). Tie a knot at one end of the yarn and wrap it around the cuts you made in the cardboard. Once you’ve wrapped it around each cut, tie a knot tight to the back of the loom base.
Grab your next color of yarn and cut about an arms length of it, you don’t have to be precise with this project and I like that. Thread the yarn through your needle or cardboard tool, begin weaving over and under each “spine” piece of yarn, like so:
Once you get to the edge, go back to the other edge repeating the over and under technique. It’s pretty simple! I found this video helpful when it came to adding interesting shapes to my weavings. There are also lots of different YouTube videos with different weaving techniques!
When you’re happy with your weaving, now you can add your dowel or stick to finish it off! This part can be tricky, but what I do is weave up pretty high on the loom (not all the way to the top, but enough so that the loops will hold tightly around the dowel). I grab one loop (from the top) and push it onto the dowel and continue until all of them are off, I secure them by weaving more yarn in between the spaces. To finish the bottom, you can just pull the loops off and adjust the weaving so that they cover the gaps, or you can cut the loop and sew in the ends if you prefer (gives it a cleaner edge).
Add some yarn to the dowel so that you can hang it and, ta-da! That’s it. (Hopefully this wasn’t too confusing, but like I said there are a ton of YouTube videos with techniques if you get confused!) I think these work up pretty quickly, I watch Shameless while making them and I can usually get one done in 2-3 episodes depending on how much I’m focusing on the project.

Magazine Clippings Collage
I think this is a really amazing way to showcase some things that you like on your wall. Grab some magazines and start clipping away! I took a piece of chip board (the back of a notebook) and cut a 2×2″ square out of it with an Xacto knife so that all of my clippings would be the same size (make sure to use a cutting mat in between the pages!) If you don’t have that option, you can definitely use scissors.
Cut out different textures that you like. Maybe celebrities or high fashion pictures. Whatever you like! Once you’ve collected enough, arrange them in front of you and find a combination that you like. Grab some double sided tape and tape them on your wall in the layout you created! (If your college doesn’t allow that, tape them onto a poster board instead then use command hooks to hold up the poster board).
 Photo Banner (with prints from Prinitki!)
I think these photo banners are a great way to bring some life into your dorm room. It’s a good way to showcase your friends, family, pets and past memories.
What you’ll need:
- Printed photos
- Clothespins
- Yarn/Twine
- Hooks for hanging
Printiki is a website that will print your photos for you and deliver them right to your doorstep! When you’re on a college schedule, you definitely don’t have time standing at a photo printing kiosk for hours printing out your pictures – that’s where Printiki comes in! All you have to do is upload the images you want from Facebook, Instagram, Dropbox, etc and wait patiently for your prints to arrive. Not only do they print photos, they also have options for photo books and posters, pretty cool if you ask me.
I got my images printed in the Square M size, without the border, and with the glossy finish. They do have a few different options to choose from, so definitely explore their website to find out more.
Cut out some yarn or twine to the length that you want. Tie it to the hooks that you’re using to hang them. I cut my yarn a little bit long so the yarn would drop if that makes sense haha.
 Attach your prints using the clothespins! It’s super simple, but a really cute way to add some life to your dorm. I even created some fall inspired images, so maybe there’s and idea for you to change the images for the seasons/holidays. These prints (or maybe even a photo book!) would be a great idea for a gift. Make sure to follow Printiki on Instagram to see some new ways to display your prints!
If you use the code “9THGRK2R” you can get free shipping on your order! Just apply it at checkout 🙂 My gift to you.
I hope you enjoyed the post! What’s your favorite DIY project in this post? Let me know in the comments 🙂
Thanks so much for reading, as always <3
Xoxo, Rae
Disclaimer: These prints were sent to me for free in exchange for a review, but sponsorships/items sent to me do not alter my opinion in any way. I’m here to help you (my readers) to find new products that you may have never heard about. I am all about giving 100% reviews, whether I’m paid for the review, sent the item or I purchase it myself. Just something to keep in mind for my past/future reviews. This post does contain affiliate links.

[…] get yours up to scratch it’s important that you learn to plan your time properly with adequate space for life tasks, and rest, as well as study and assignment […]